How to Shoot Freediving Photography | Poses, Light and Preparation
 How to Shoot Freediving Photography | Poses, Light and Preparation
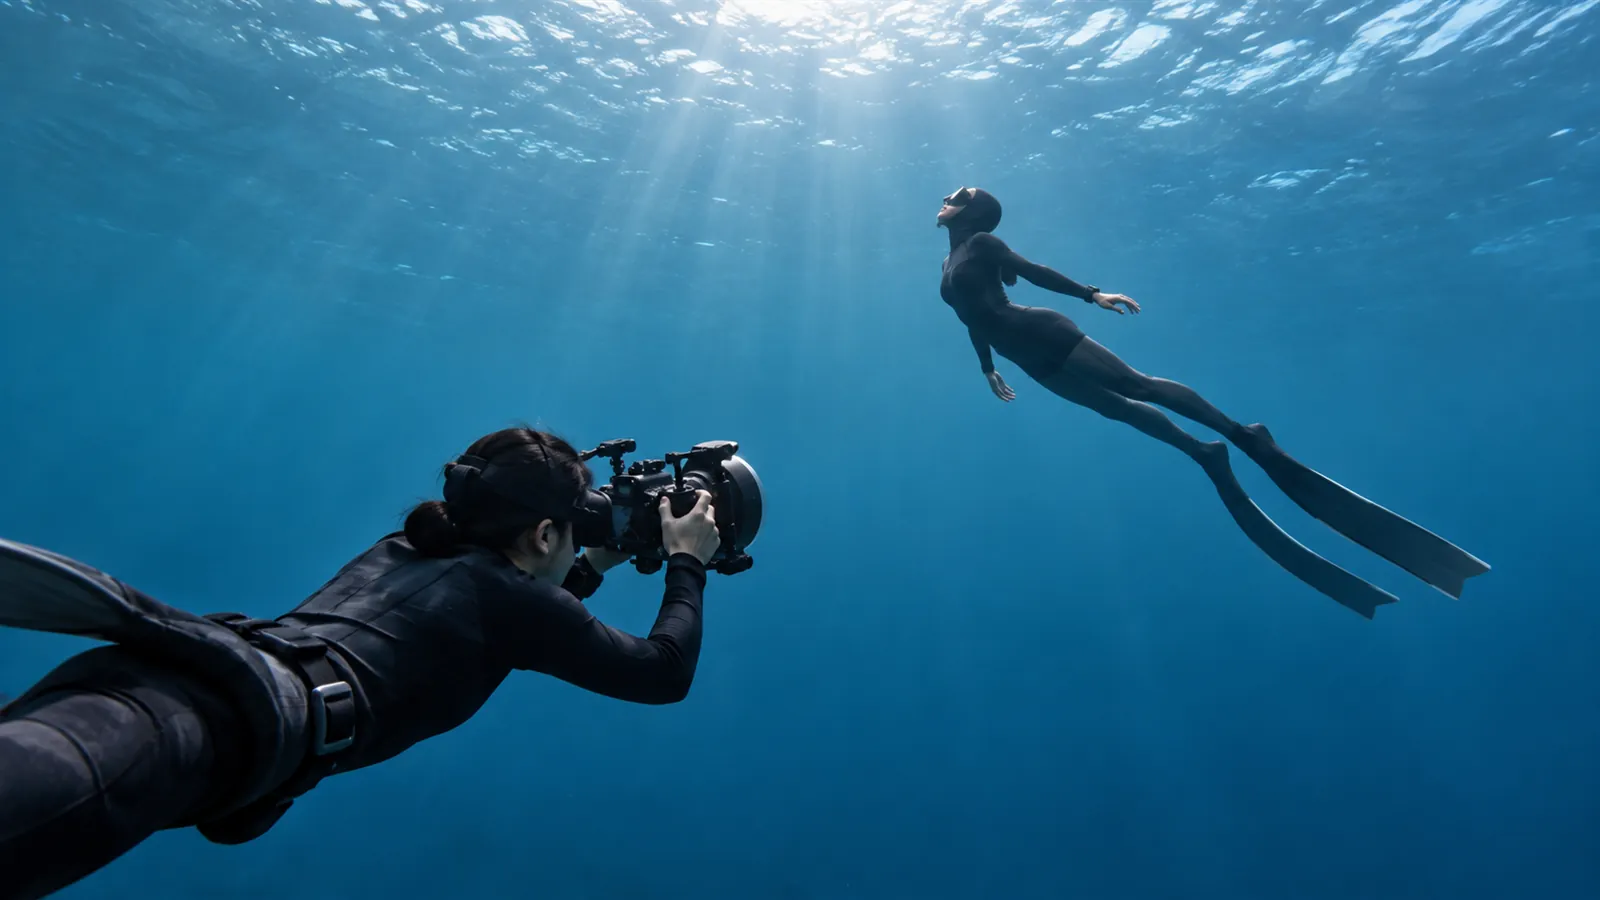
First, the question you care about most: why is it easier to get clean underwater photos while freediving? Because freediving usually has no bubbles in the way. Bubbles exhaled by scuba divers burst into a mass of white noise in the frame, and can also disturb fish; a freediver hovering quietly in the water makes for a simpler image. Of course, the final result still depends on light, visibility, composition and shooting technique — no bubbles does not automatically mean a good photo.
This article is about "how to capture that advantage": from preparation before the descent and pose design, to light, color and safety limits.
Before You Shoot: Decide What You Want to Capture
The most common mistake is starting to think about composition only once you are in the water.
Settle these points before the descent:
- Who is the subject: a person as a silhouette? Or a person in the same frame as a school of fish?
- Where the camera is: is the photographer at the surface, or is a buddy on the other side underwater?
- Light direction: front light or backlight (silhouette)?
- Hand signals: give an "I'm ready" signal first, then start the descent;
- The limits for this descent: planned depth, planned time, and when you must surface.
Breath-hold time varies from person to person, and underwater movement and shooting use extra oxygen. So fix the plan before you get in the water — never extend a breath-hold just to get one more shot.
Running through the movements with the photographer on the boat is ten times more effective than gesturing underwater.
Poses: The Difference Is in Those Few Inches
With the same depth and the same light, a small difference in pose makes a clear difference in the photo.
- Point your toes: the fin blade forms a clean extended line; bending at the ankle makes the legs look short;
- Arms close to the body or extended forward: do not spread them wide, and do not paddle around;
- Tuck the body into a streamlined shape: picture yourself as an arrow;
- Chin slightly tucked, gaze following the line of the body; do not lift your head to look at the camera — unless a straight-on face is exactly what you want;
- The moment of a controlled descent usually has the most tension: provided your weighting is right, equalization is going smoothly, and you are still within the planned depth; if you feel discomfort or cannot equalize, stop the descent and ascend immediately.
Hovering is a basic skill for shooting portraits. To hold still at a given depth, you rely on correct weighting plus small posture adjustments, not on constant paddling — if you keep moving, the image blurs and the pose falls apart.
One important note: weighting must be set with an instructor's guidance and checked at the surface, to make sure you can still float comfortably after exhaling. Do not add weight in order to achieve a hovering pose or a good angle.
Light: Half of What Makes a Photo
Water absorbs light, and it absorbs red first. But the depth at which colors visibly start to drop out varies with water conditions, visibility and weather; there is no single fixed boundary.
| Approximate depth | Typical situation | What to do |
|---|---|---|
| 0–5 m | Colors are relatively complete (red light has already begun to fade) | Natural light is enough; good for portraits |
| 5–10 m | Red is noticeably lost | Consider a red filter or adjust white balance in post |
| Deeper | Overall blue-green cast, lower contrast | Bring a video light if possible, or switch to a silhouette composition |
A few practical tips:
- Front light (sun behind you): the fullest color; good for shooting a person together with a school of fish;
- Backlight (sun behind the subject): good for silhouettes, turning the person, the light patches and the outlines of fish into black silhouettes;
- Place the sun at the edge of the frame rather than the center to avoid large areas of overexposure;
- Natural light patches near the surface (not hard beams of light) make the most appealing background — simply have the subject pass in front of them;
- A red filter is not a cure-all: it costs you light and only suits certain ambient-light conditions; when using a video light, whether to add a filter usually depends on your gear and what you are shooting;
- Do not count on post-processing to rescue color: if you go too deep, trying to bring red back produces very obvious noise.
Gear: Enough Is Enough, but Watch the Load
- A wide-angle or slightly wide-angle lens is the workhorse underwater, fitting both the person and the surroundings into the frame;
- The housing buttons must be operable with one hand, because your other hand is usually busy holding your position;
- Natural-light shooting: light and flexible, suited to the "one breath" rhythm of freediving;
- A video light can improve color at close range, but it also adds bulk, drag and handling workload: it must be attached securely, cables must be kept from tangling, and it must not interfere with your buddy's ability to monitor you;
- Do not mount a camera on your mask: it increases frontal area and drag, makes both descent and ascent harder, and makes the footage shakier.
Safety: This Section Matters More Than Everything Above
Shooting significantly increases distraction and task load — you are managing composition, posture, breathing and depth at the same time. So the safety plan, breath-hold limit and turnaround time must come before composition goals.
- Never extend a breath-hold for a photo. Most problems happen at the moment of "one more try and I'll get it";
- Assign roles clearly: who does what — the diver, the photographer and the safety buddy — and agree on it before entering the water. Follow the one-up, one-down system; the buddy must be dedicated to close-range monitoring and cannot shoot while watching the diver; if the photographer is also acting as buddy, a third person must be dedicated to monitoring;
- Do not take rapid, deep breaths before a descent. Hyperventilation lowers carbon dioxide and delays the urge to breathe, allowing a hypoxic blackout to happen before any obvious discomfort — use the relaxed breathing method your instructor taught you, and do not treat the urge to breathe as a reliable safety warning;
- After surfacing, complete recovery breathing and the surface protocol as required by your training agency, with your buddy watching closely throughout the final ascent and after you surface. If there is a loss of consciousness, altered consciousness or suspected water aspiration, start emergency care and medical evaluation immediately;
- Do not shoot in boat channels or near docks; carry a float or surface marker on your ascent so passing boats can see you;
- Equalize early, often and gently; never force equalization; follow the one-up, one-down system, allow enough surface recovery intervals, and take particular care to prevent hypoxic blackout during the final ascent and near the surface; if you dive deep repeatedly, ask your instructor specifically about the risk of decompression sickness.
FAQ
Q: Can I get good freediving photos without a professional photographer? A: Yes. Less bubble interference is an advantage in itself — quiet, relaxed posture. But two things are not optional: the person shooting should have rescue skills (or a separate safety diver should be watching on site); and even in shallow water of around 5 m, follow the buddy system, complete the surface protocol after surfacing, and have your buddy keep watching.
Q: Why do my photos always look gray and flat? A: It is usually color loss and reduced contrast caused by depth. For image quality, shallower positions usually keep color better, along with adjusting white balance. Note: this is advice about image quality, not a safe depth limit — how deep you actually go must follow your training level, equalization ability, environmental conditions and buddy setup.
Q: When is the best time to shoot? A: There is no time window that works everywhere. The best time depends on local latitude, season, weather, sun height and water visibility; usually you choose a window with the right light direction and surface conditions, and judging on site is more reliable than applying a rule of "10 a.m. to 2 p.m."
Q: What else should I watch out for when shooting video? A: Stability matters more than settings. Freediving footage is clean to begin with; moving at a steady pace and avoiding sudden turns is more effective than shooting at a high frame rate.
Q: Can I ask the dive guide to shoot for me? A: Many dive shops and instructors offer shooting services. Confirm that they have rescue skills and are clear on the day's safety plan, and communicate in advance the shots you want and the safety signals.
Keep within your safety limits, then go after that one photo — the most appealing freediving images are always of a person who is relaxed.
This article is for general information only and does not constitute shooting or training advice. Freediving is a high-risk activity; learn under the guidance of a certified instructor, and never extend a breath-hold for a photo or dive alone.