Freediving Descent Techniques | Duck Dive and Kick Efficiency Explained
 Freediving Descent Techniques | Duck Dive and Kick Efficiency Explained
Let's answer the question you care about most: why is my descent slow and tiring, while others glide down with one easy movement?Because a descent is not "swimming down" — it is getting your body into the right position, then letting the change in buoyancy do the work. If you claw and kick your way down, all your effort goes into the water, and you burn oxygen for nothing.
This article breaks down the three parts of a descent: the duck dive, the streamlined position, and kick efficiency, plus the most common technical mistakes.
Step 1: Duck Dive
The duck dive is the transition from "floating horizontally" to "head down," and it is the step most often done wrong.
Breaking down the movement:
- First float face down at the surface and take one comfortable, full preparation breath — just relax naturally; do not force a maximum inhale, do not pack air, and do not hyperventilate;
- Fold from the hips, pressing your upper body toward the water, as if you were a folding knife;
- Lift one leg upward to create a lever — this leg is your "counterweight" for entering the water;
- Once your center of gravity passes below the surface, bring the lifted leg back and close both legs together;
- Only after a coach has assessed your weighting and confirmed that you still have positive buoyancy at the surface, let your body position and the change in buoyancy assist the descent; do not pull down with your arms.
Key point: the lifted leg is a lever, not a kick. Many people turn it into "kicking downward," and the result is that the body still floats and the surface gets churned up. Also, during the duck dive, your arms can stay at your sides (most streamlined) or grip the rope (in free immersion), but do not spread them out in the water.
Step 2: Streamlined Position
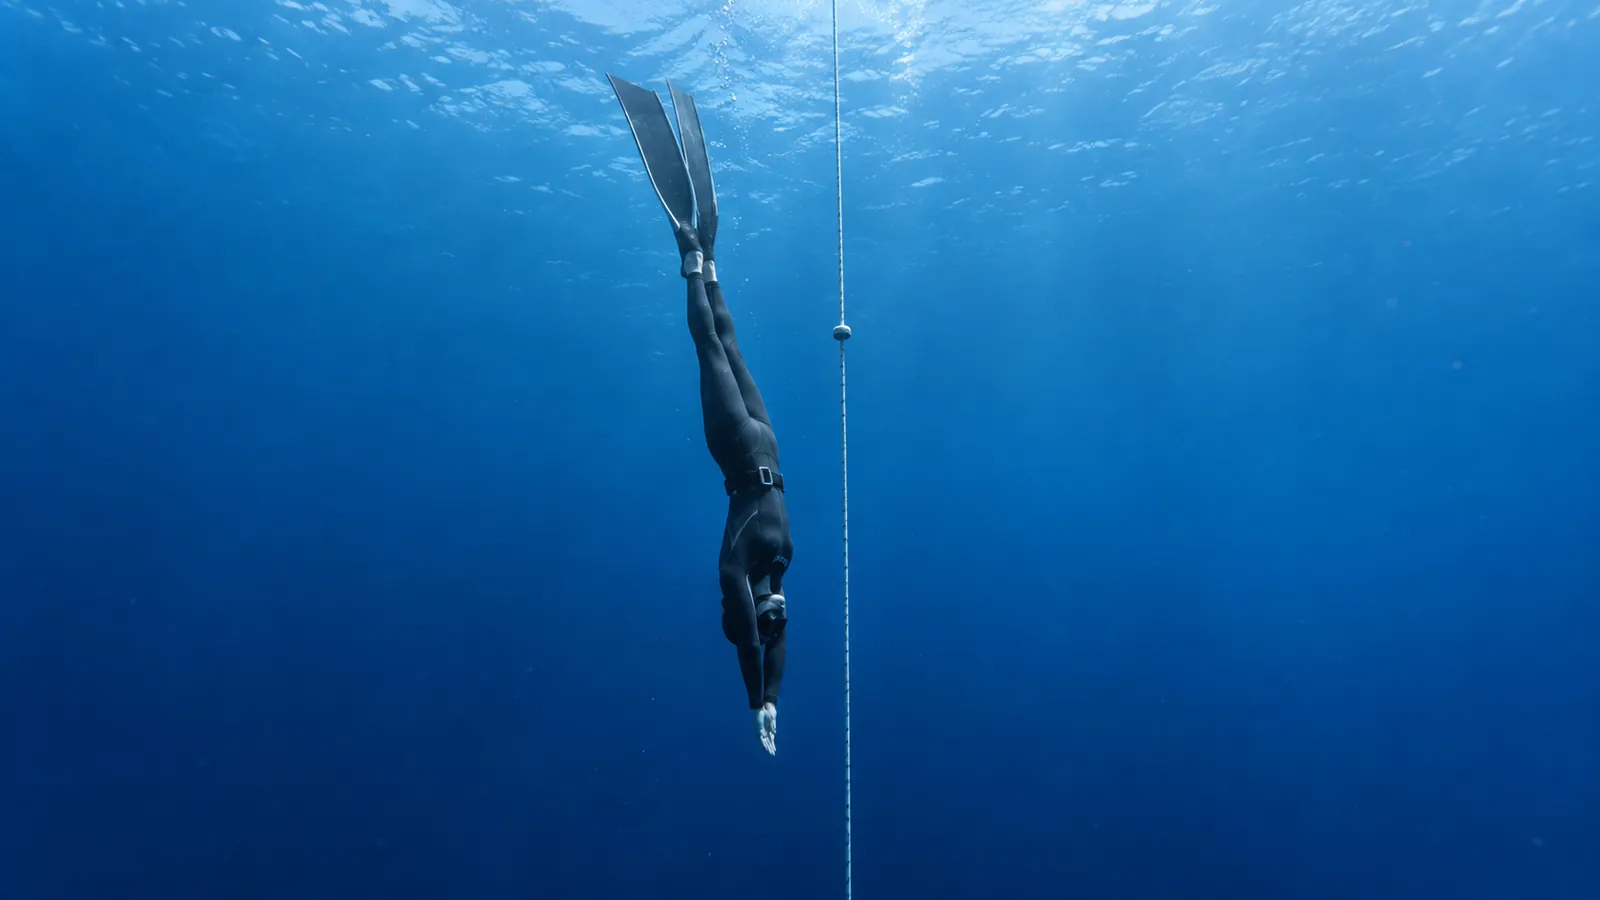
From the moment you enter the water until you begin to sink, you need to turn yourself into a "point" as quickly as possible.
- Arms tight against your sides, or extended forward and squeezing your head;
- Legs together, knees not splayed out;
- Toes pointed (especially important when wearing long fins);
- Head in line with the spine (chin slightly tucked); do not look up toward the surface or into the distance, and do not bend the neck to look down.
Why is head position so important? Looking up makes the body form an "L shape," which greatly increases drag and throws off your descent direction; excessive neck flexion breaks the streamline and the natural control of your airway, and also makes it harder to equalize steadily. With the body vertical and the head and neck neutral, your descent direction is naturally vertical; when descending along a rope, just look at the rope in front of you.
Step 3: Kick Efficiency
Kicking is usually one of the more oxygen-demanding parts of a descent (it depends on depth, equipment, technique and your condition on the day), and a small loss of efficiency costs you a large amount of depth.
| Common mistake | Result | Correct approach |
|---|---|---|
| Bicycle kicking (knees bent a lot) | High drag, low propulsion | Drive from the hips and move the whole leg in a small sweep |
| Kicks that are too wide | Fast oxygen use, body swaying side to side | Small amplitude, steady frequency, letting the fin blade rebound naturally |
| Stiff ankles | The fin blade cannot form an effective angle | Relax the ankles and let the fins "flick" |
| Kicking without gliding | Exerting force the whole time, with no glide phase | Let the body glide after each kick, then kick again |
| Kicking with the legs apart | The body sways from side to side | Keep the legs together and the movement symmetrical |
The essence of saving energy is "gliding," not "exerting force." After one effective kick, the body should glide downward with momentum; if you are pushing hard the whole way, your kicks are too wide or your position is too loose.
Free immersion (FIM) uses no fins at all: you pull down the rope hand over hand, with small, continuous movements, and take care not to make the rope swing back and forth.
Equalization: The Real Barrier to Descent
No matter how good your technique is, you cannot descend if you cannot equalize.
- Equalize early, actively and gently. Add an equalization before you feel pain or clear discomfort; do not wait until your ears hurt;
- The Valsalva maneuver may work in shallow water, but it becomes less effective as depth increases. It is especially likely to fail when you are head down, so learn Frenzel equalization under a coach's guidance; deeper training may also involve techniques such as mouthfill;
- Pain is a signal to ascend immediately, with no exceptions. Pushing too hard can cause eardrum or middle ear injury;
- Do not get in the water with a cold, a blocked nose or during an allergy flare-up; if the eustachian tube is not clear, forcing equalization multiplies the risk;
- Do not hyperventilate before a descent: it only suppresses the urge to breathe, which delays the hypoxia warning and increases the risk of shallow-water blackout (BO).
The Last Part of the Descent: Freefall
Once you are below your planned neutral depth, have confirmed that you are negatively buoyant, and can maintain position and equalization control, you can gradually reduce or even stop kicking and let gravity do the rest — this part is called freefall.
The depth at which freefall begins varies from person to person, depending on body weight, weighting, equipment (the air bubbles in a wetsuit and the gas in the lungs are compressed with depth) and the water, so there is no universal number.
But "relaxed" does not mean "letting go": if you lose position control or cannot equalize, immediately resume effective movement and ascend according to plan. Many beginners panic instinctively the first time they feel themselves "dropping" and start kicking hard, which burns through their oxygen; relaxation is part of the technique, but only if you are still in control.
Buddy and Rescue: The Hard Prerequisite for Descent Training
However good your technique is, you cannot skip this section.
- Follow the one-up, one-down system: while one person descends, the buddy watches from the surface the whole time and can reach them within the last few meters of the ascent and the first few seconds after surfacing;
- Shallow-water blackout (BO) may give no warning at all — it is most often seen at the end of the ascent and in the seconds after surfacing. So the diver must still do recovery breathing after surfacing and complete the surface protocol, with the buddy continuing to watch and confirming that consciousness and breathing are normal before the dive is considered finished;
- The buddy must have breath-hold rescue skills, and know how to establish an airway, give rescue breaths and tow the diver out of the water;
- Depth training must be done with descent and ascent along a rope, supervised by a coach or a dedicated safety diver, and never alone;
- Never do breath-holds alone — including in the shallow end of a pool, in a bathtub, or in a basin at home.
FAQ
Q: Why do I always float back up after the duck dive? A: It is not necessarily a matter of too little weight. First check your hip fold, your leg-lift lever and your streamlined position; if the movements are all correct and you still float, do not add weight on your own — a coach should assess this in a controlled setting, and make sure there is still enough positive buoyancy at the surface and at rescue depth.
Q: Should kicks be fast or slow? A: Slow, steady and with a small glide is more effective than fast. Kicking at a high frequency with irregular amplitude uses a lot of oxygen and provides little propulsion.
Q: What should I do if I keep feeling an uncomfortable urge to breathe during the descent? A: The urge to breathe is not the same as hypoxia, and it is usually related to tension or overworking. First reduce the intensity and slow the pace; if you feel dizzy, your vision narrows or your limbs go numb, end the descent immediately and surface.
Q: Can I practice descents on my own? A: No, you cannot practice alone. Any breath-hold in the water must have a buddy present who has rescue skills, and depth training also requires descent and ascent along a rope, supervised by a coach or a safety diver.
Q: How long does it take to master these movements? A: This varies a great deal between individuals. Some learners can master the basic movements after a few practice sessions under a coach's guidance, but efficiency and consistency require ongoing training — they cannot be copied by watching a few videos.
This article is for general information only and does not constitute training advice. Freediving is a high-risk activity; please learn under a certified coach's guidance. If you cannot equalize, ascend — never force it — and always follow the buddy system.